


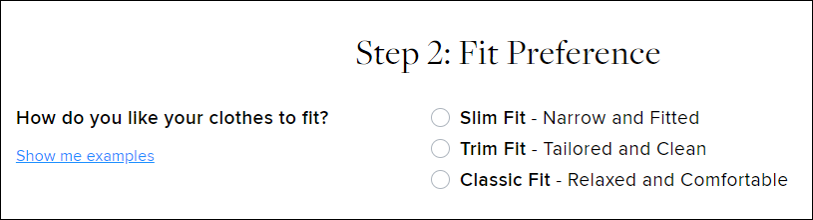
During the pre-appointment survey, your client selected an overall fit preference for his upper body garments. The chart below explains how the chosen preference will affect the ease added to your client’s shirt. Remember ease is the amount of fabric added to the shirt over the client’s core measurement.
Body fit | Preference |
+3, | Slim, narrow and fitted. Generally for younger clients looking for a close fit with minimal fabric around the waist and chest. |
+4 | Trim, tailored, and clean. A great starting place for new clients. The shirt will follow the shape of the body without being restrictive. |
+5 | Classic, relaxed and comfortable. Best for more traditional Clients who are most interested in comfort. |
Ex. Your Client has the following body measurements and selects a slim fit preference.
Body (Core) Measurement | Body Fit (based on preference, see chart above) | Finished measurements (How the shirt will be made) | |
Chest | 40 | +3 | 43 |
Waist | 34 | +3 | 37 |
Hips | 38 | +3 | 41 |

3” is added to your Client’s wrist measurement in order to produce the finished cuff. This ensures that your Client has enough room for comfort.
We can also make an adjustment to account for the Client’s watch. If the Client would like to wear his cuff over his watch, this adjustment can be made by choosing the “Watch” option in the Shirt Product Profile:
Adding the large watch options adds .75” to the finished cuff size.

T.A.P.E. automatically utilizes your client’s core measurement shirt length to create a tucked in shirt. If you client would like to wear his shirt untucked, utilize the shirt fit quiz within the shirt product profile.


When Always untucked is selected T.A.P.E. recommends a length 2” shorter than the client’s core measurement shirt length . Additionally, T.A.P.E. will straighten out your client’s shirt to ensure that there is only a 2” difference between the waist and hip of the shirt. This ensures that your client’s untucked shirt has the correct straighter shape to be worn untucked.
T.A.P.E. will recommend a Sleeve Fit based on your client’s Fit Preference and core measurements. Our sleeves range from Extra Fitted, our slimmest most popular sleeve, to Full. As you move from Full to Extra Fitted, the armhole of the shirt raises, and the overall circumference of the sleeve is slimmer.

The Armhole and Elbow Adjustment allow for adjustments between the Sleeve fits in .25” increments. If an adjustment is necessary, it will be included in the T.A.P.E fit recommendation. Adjustments can also be used on a second shirt to refine a shirt fit based on client feedback and preference.

Most of your Clients will have a normal shoulder frame. However, there is a small percentage of men who need a shoulder adjustment on their custom shirts. Around 2% of our Clients have sloping shoulders (A body) and less than 1% of them have square shoulders (T body).
Instead of looking at the Client’s actual shoulders, observe the wrinkles on the front of the shirt that would indicate that an adjustment needs to be made. If there are no wrinkles on his off the rack shirt, (see first photo below) we recommend keeping the shoulders set as “Standard”.

To request an “A” or “T” body adjustment on your Client’s shirts, update your Client’s Shirt Product Profile:


The standard height on most of our collars is 1.5″ in the back and 1.25″ in the front . You can request the collar band to be lowered by 0.25” or raised by 0.25” or 0.5” on all collars except Modern Spread, Modern Button Down, Club, Banded, Two Button Cutaway, and Wing Tip. Selecting to raise or lower will apply to both the back and front of the collar as requested.
Raising or lowering the height of the collar band allows you to accommodate your Client’s unique proportions. For example, a Client with a long neck may need a higher collar to be proportionate. Alternatively, a Client with a short neck should opt for a lowered collar band height. Additionally, some Clients may want a “taller collar style” which this adjustment allows him to achieve.
To modify this option on your Client’s shirt, select an option from the drop down menu next to “Collar Band Height Adjustment” under Advanced Shirt Options in the Shirt Style Options section of the order page.
The standard spacing between the collar button and the first button on the shirt placket is 3.5”. You can request the first button to be raised or lowered in the following increments:
Adjusting the button placement allows for a personalized look and also helps in a situation where the Client has a gap at the top of the placket. The adjustment originates at the first button under the collar button and is then applied down the shirt for the rest of the buttons. For example, raising the button placement brings the first button up closer to the collar and reduces the space between the collar and first button, smoothing out any rolls between the buttons. This adjustment also offers your Client customization options for when he is wearing his shirt without a tie by specifying where on the placket the shirt will open with an unbuttoned collar button. Keep in mind that changing the button placement affects the entire shirt, not just the first button. For example, raising the first button 1” results in every button to come up 1”. The same holds true for lowering the button placement as well.
To modify this option on your Client’s shirt, select an option from the drop down menu next to “First Button Placement” under Advanced Shirt Options in the Shirt Style Options section of the order page.
We are able to lower the angle at which the front of the collar is attached to the shirt. This adjustment is best for Clients with a shorter, thicker neck. The collar will be attached to the shirt at a slightly lower angle to provide more room directly below his chin (the factory lowers the front neck drop by 0.5″). Lowering the neck drop gives them a bit more room and prevents the top of the collar digging into his neck.
We are able to adjust the collar points on the following five collars:
We can adjust the collar points to:
The length of the collar point on your Client’s shirt is a very particular adjustment. This is only recommended if your Client requests a certain length. For example, your Client likes a Cutaway collar but wants a longer point length for a more proportionate look. Keep in mind that you cannot adjust the collar band height and the collar point length for the same shirt.
Tie space” is the distance between the top parts of the collar points when the shirt is buttoned. Our standard tie space is 0.25”. We offer the option to adjust that spacing to 0”, 1/8”, or ½”.
Tie space provides room for a tie knot. Our standard tie space is ¼” and adequate for most Clients. However, some Clients might want more or less space in this area depending on the look and type of tie knot. “0” tie space gives a clean, angular look to the collar, and typically not recommended for Clients that wear ties, as it doesn’t provide any extra room for a knot. Conversely, if your Client wears ties often, and ties a larger tie knot, adding some room in the tie space will allow the tie knot to have room between the collar points. Typically, collar points shouldn’t cover any part of the tie knot.
Our shirts come standard with top stitching, which is 0.25” from the edge of the fabric. If you select this option, the stitching will be be 1/8” closer to the edge on the collar and cuffs.
Edge Stitching provides a clean look to the collar and cuffs. Although this option might be unknown to a lot of Clients, it is a nice option on a more “formal” shirt. Consider this similar to opting for no pic stitching on a Sportcoat lapel.
We offer the option of placing collar and cuff fabric on the bias. Placing fabric on the bias means turning it on a 45 degree angle. There are four options to choose from when requesting the fabric to be produced on the bias:
This style adjustment adds a unique look to a shirt collar and/or cuff. Put simply, it draws attention to these areas, as placing the fabric on the bias will look different than the pattern on the rest of the shirt. This is best used for a casual or social shirt and we recommend only adding this option once you’ve discussed with your Client how this Styling option will look. Keep in mind, this option will be most noticeable on a pattern or striped fabric.
To add this option to your Client’s shirt, select an option from the drop down menu next to “Collar and/or Cuff Bias” under Advanced Shirt Options in the Shirt Style Options section of the order page.

A gap can occur between the collar and the first button due to posture or body shape. The most common fix for this is to raise the first button on the placket so that it is closer to the collar button. When you raise this button, the remaining buttons will be spaced accordingly. The most common amount to adjust this is 1”. Feel free to reference the Custom Shirt Adjustments article for more details on the various options available.
In order to have the first button on the placket raised, select the First Button Placement in the Advanced Shirt Options on your clients profile. In the First Button Placement toggle you can select to increase or decrease the First button in .25” increments.


A roll under the collar band is normally caused by the back of the collar band being too tall for the Client’s neck. The best course of action is to lower the collar band, if this is available with your Client’s preferred collar style. (See the Custom Shirt Adjustments article to learn which collars can be adjusted.) Another option is to opt for either the Modern Spread or the Modern Button-Down, which automatically have a lowered collar band.
Also, this is not as common, but the Client may need a shoulder adjustment (A or T body adjustment). Please reference the “Does my Client need a shoulder adjustment?” question above.

The best way to reduce the flare at the hip is to adjust the measurements for the finished waist/and or the finished hip to straighten out the silhouette. This can be done by increasing the finished waist and/or decreasing the finished hip. Ideally, the shirt waist/hip difference would not be larger than 6” in order to ensure there will not be a flare on the shirt.

Training for our Winter 2022 Collection is here. For our launch presentation featuring the seasonal inspiration, and walk through of Key Looks, please view the recording available in the Fall/Winter 2022 Toolkit. You can also reference Fall 2022 Master Swatch List for details on all available fabrics, availability, and pricing.
Details on our Summer 2022 shirting assortment with new fabrics from Ratti, Canclini, and Somelos.
Slides presenting our Spring 2022 Shirting assortment with fabrics from Albini, Canclini, Ratti, Soktas, Somelos, and Thomas Mason.